Showing posts with label orange juice. Show all posts

08 January 2012

Ginger Pepper Coconut Cakies

Today, the kitchen is overwhelmingly nutmeggy. Urg. I'm not sure why I dislike the sweet smell/taste of nutmeg. I was going to make gingersnaps but we don't have molasses. We've never bought molasses before...so instead, I sort of invented ginger pepper cookies/cakies, which I am sure exist elsewhere in the world. They look more like mini scones/cakes than cookies, mainly because I did the whole orange juice citric acid+baking soda thing again. Using this recipe as a basis, I flung around ingredients and burned down the kitchen. Luckily, I am going back to UPenn today, so I'll have somewhere to live while my family live in a kitchen-less house. Just kidding, I'm not Chowder. But we did have a 90 minute power outage yesterday.

They are cakey, slightly gingery, are a bit moist and textured due to the whole wheat flour and coconut, and lack crunch and buttery-ness. Not gingersnaps at all...more like a spice cake?
INGREDIENTS --makes 25 pretty big cakey cookies.
75g white sugar
75 g brown sugar
1 stick butter
1 egg
3 tbsp orange juice

some cinnamon
some nutmeg (I put in 1 tbsp, which was too much, as I'm not a fan of nutmeg).
some tablespoons of ginger powder
some tablespoons of ground black pepper (add dried chili flakes if you want?)
300 g whole wheat flour
50 g dried coconut (I used unsweetened, local)

1 tbsp baking soda

METHOD
1. Cream sugars and butter. Throw in the egg and orange juice.
2. Add the dry ingredients, ~80 g at a time. Fold.
3. Add the baking soda. Fold.
4. Scoop onto pan-greased-with-butter-wrapper.
5. Bake at 350 F in an un-preheated oven for 15 minutes on the middle rack. Let sit for about 10 minutes, or more. Just keep checking with your fork (it should come out clean, and the cookie should look solid).

26 December 2010

What?! Cheesecake?!

Yes! Cheesecake! With tofu! The recipe is at the bottom of this post! [I haven't posted a recipe in a LONG time... a whole semester, right?]
I had a problem. I wanted to make cheesecake because BV likes cheesecake. However, I have never used sour cream or heavy cream or whipped cream or dairy products like that in my cooking before, so... I felt scared using them. Okay, I've used whipped cream before, but that was at least 5 or 6 years ago, and that was whipped cream used as... whipped cream.

On the other hand, I squeezed a piece of tofu. [haha. weak joke...]...I mean, on the other hand, I know very well how tofu works. I can make food with tofu.
BV hates tofu but I used it anyway...
The first cheesecake turned out tasting like tofu, because I had used approximately 20 ounces of tofu in it... along with some cranberry juice, because, why not? I also threw in some corn starch to keep it from falling apart, although I'm not sure whether it's necessary.
It looks like cheesecake, right?
Or, it looks like stained bacteria cultures...
I personally like frozen cheesecake, and I think this is due to the fact that the first few times we bought cheesecake in HK [33HKD for a plain Sara Lee cheesecake - that's what I remember], we never followed the "leave cheesecake at room temperature for 20 minutes before eating" instruction. Honestly, frozen cheesecake, with the hard, ice-blockish texture, tastes better than creamy, room temperature cheesecake.
I used Grape-Nuts for the crust, because ever since I found out that every graham cracker at Shoprite has PHO, I've decided to dislike them [yes, I'm biased!! But so are you!]. Maybe Trader Joe's has nicer graham crackers?
I've also decided to dislike Keebler because everything they make [that I know of] is grossly full of HFCS and/or PHO.
So, in my second batch, I gave some leftover batter to my sister who ended up decorating them with candy and sprinkles. It is utterly overkill.
This is the cheesecake I gave BV. I probably shouldn't've told him that there was tofu in it... but I guess he couldn't taste it [except for the "weird texture"] because he didn't say that it tasted tofu-y.
This is the 3rd cheesecake [from the second batch] that I gave to JM, and I decorated it using the leftover icing sugar from the cookies.

Recipe for cheesecake!!!!

Filling:
1. 8 oz cream cheese, cut into chunks [one package. GET FULL-FAT. DON'T GET LOW FAT!!! This isn't because full-fat cream cheese is healthy or anything; it's just because I'm not sure how fat-free cream cheese melts/reacts with my other ingredients...so I suppose you could get fat-free cream cheese if you want.]

2. 10 oz squeezed firm tofu [or 20 oz if you want the tofu taste to be prevalent. By "squeezed", I mean, try get rid of as much of the water as possible. I did this by literally squeezing the tofu, which incidentally mashed the tofu so it was easier to blend.]

3. Blueberry, or 2 tbsp cocoa powder, or whatever flavouring.

4. At least half a cup of orange juice. [Or lemon juice. An acidic juice. The orange juice actually left a tiny bit of orangey taste... although that could've just been my imagination]

5. Around 4 tsp of corn starch [add more if you feel like it. I'm not quite sure how much I had, since I initially had 2 tsp, then during the blending, I added more.

6. 1 cup of confectioner's sugar! [YES!! More if you feel like it.]

Healthy Crust!
1. 2 cups of Grape-Nuts

2. Honey or sugar water [However much you want; if you want a crunchy-tooth-breaking crust, don't use that much water, but if you want a soft crust, add more water until it looks damp!]

Stuff to do!
1. Pulse and shake cereal and sugar/honey/water mixture until you get fine pieces.

2. Press into a 11-inch pan if you want the crust to just fill the bottom. Alternatively, press into a 9-inch pan if you want crust on the sides. I used a 7.5-inch pan and had a lot of crust leftover [hence the mini cheesecakes that my sister studded with sprinkles...]

3. Bake at 350F for 5 minutes. You do NOT need to preheat your oven. That is a waste of heat.

4. Stick everything in the Filling list in a blender, and blend! After a few minutes on Low, you should have something that is uniformly blended and has the consistency of American pudding. If not, make it more pudding-ish, by adding corn starch and/or orange juice. I know "consistency of American pudding" is really hard to define, but it shouldn't be like cookie dough. It also shouldn't be like cake batter. It's more... elegant and poofy than those. Actually, it's sort of gelatinous.

5. Taste it. If it tastes good, cool. If it doesn't taste sour enough, add more orange juice!

6. Pour onto crust and smooth it out.

7. Stick that cheesecake into the oven at 350F for 25 minutes. Leave it in there for another 25 minutes; why not? Use up the remaining heat!!

8. In the meantime, eat the cheesecake filling remaining in the blender. No eggs! No 90% fat! Yay!

9. Take cheesecake out, and let it cool. There really shouldn't be any browning...a tiny bit on the edges is okay, though.

10. When cheesecake is COLD COLD COLD, put it in the fridge/freezer/outside - whatever you prefer.

11. In 12 hours, take out the cheesecake and wipe off the condensation at the top, using a paper towel. Do not use a tissue. I'm not sure why the cheesecakes condensed... I think it's due to the tofu, actually, or perhaps the blueberries [high water content!]. Either way, although it makes the cheesecakes look a bit weird, it's just water after all.

12. These cheesecakes taste good for at least 3-4 days. In the freezer, they last much longer [well...duh.]

13. The cheesecake is actually relatively healthy...

15 July 2010

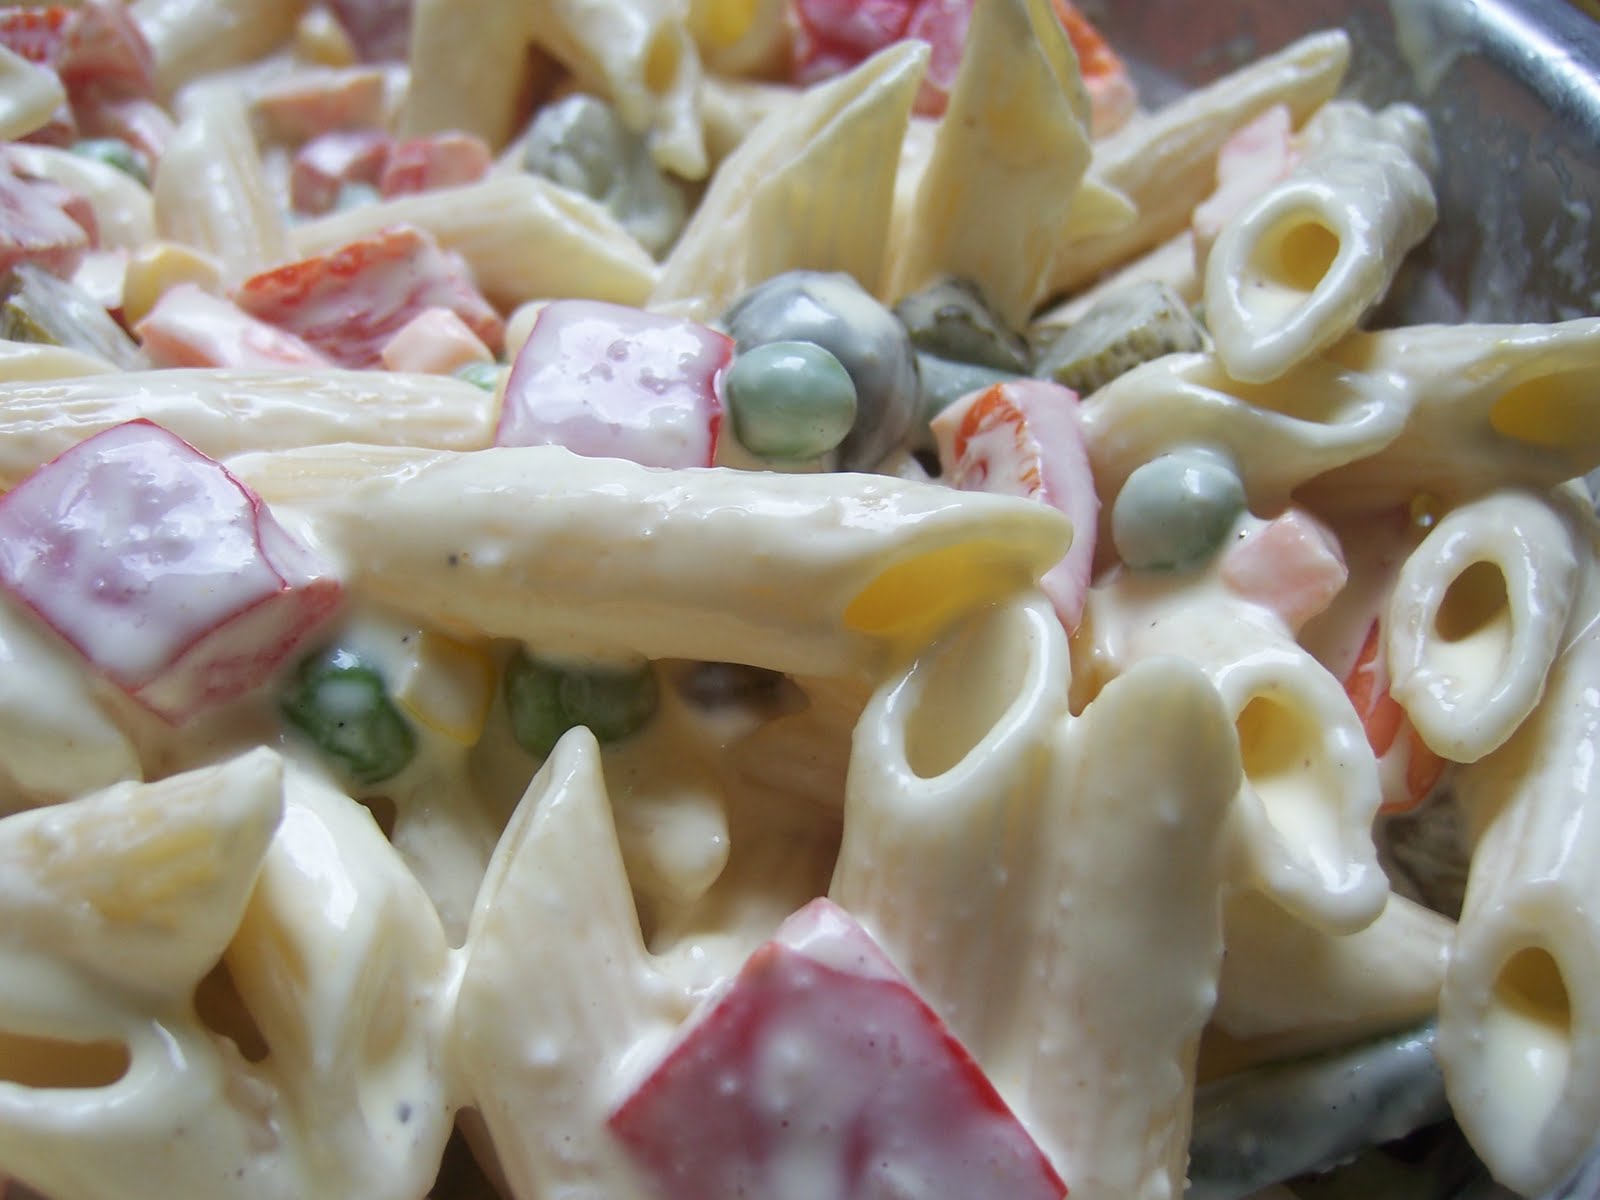
Pasta Salad!

I'll talk about chocolate some other time. Today, I actually felt like cooking so I made lunch. There are actually only 17 pieces of penne left. This is amazing because there are always tons of leftovers. [I mean, we always have leftover pasta and rice. No matter what.] Plus, my mum and brother genuinely like[d] what I made today though my brother didn't like the pickles part.

Anyway, a few weeks ago I found this recipe and the pictures were really pretty, so I decided to emulate it. In truth, I have never really had legit pasta salad. Okay, in year 7 and 8 there were these days I bought macaroni + mayo + tuna, which I suppose constitutes pasta salad. However, today's salad was LEGIT!
Tweaking The Luna Cafe's ingredients and method...

Stuff you need:
1 box/lb of penne
A chunk of frozen cut vegetables from an even larger chunk of frozen vegetables.
0.5 cups of cut up pickles
1 red bell pepper

Dressing:
1.5 cups mayo
0.5 cups low-fat milk
3 tbsp vinegar
Juice of one lemon
Pepper, salt, garlic powder [a LOT!]
1 big spoon of mustard.
Method:
1. I think the ingenuity of The Luna Cafe was that the boiling water used to cook the vegetables was then used to cook the pasta, because the vegetables were taken out using a strainer. I honestly think this is SUCH a cool idea.
2. Boil vegetables until they are soft and look cooked.
3. Make pasta and drain and let it sit there until it cools down. Don't use too much water draining it. While the pasta is cooking, cut pickles and red bell pepper.
4. Mix all the stuff in the dressing ingredients list.
5. Mix everything together.

Yes, the dressing does look rather unappetising. I just put it here so that you know you're doing the right thing. The powdery stuff is garlic powder since we don't have actual garlic.
The dressing looks delectable now :P


By this time, the pasta salad actually tasted good, except that there was wayyyy too much dressing. I somehow managed to coat all the pasta and vegetables using just half the dressing. I ended up dumping the other half in anyway, though, because, like chocolate, I suppose you can't have "too much". Though, apparently semolina likes to soak up liquid, so right now, 4 hours later, the liquid has, er, apparently decreased. I can't really tell, since there are only 16.5 pieces of penne left.

I just taste tested half a piece of penne and I have to say that this time, the penne piece tastes like it was made with the soury-fatty dressing INSIDE the semolina. Earlier, when it was just cold, you could clearly distinguish between the pasta and the dressing. Now, the dressing and pasta have formed a glutinous-y conglomeration of awesomeness. An analogy would be
bread in a pan + egg in a pan = fried egg on toast.
but
bread soaked in egg overnight = eggy bread [more commonly known as "French toast" in the U.S]

This was delicious pasta salad, since you could definitely taste a sourness and tangy-ness that comes only in PASTA salads! In retrospect, if I made the dressing more vinegar based rather than mayo based, I probably would get something completely different, [vinaigrettey salad?] which I would like to try out actually, since it would be healthier. [NEVER, EVER, EVER, use low fat or fat free mayo. It's crap in a jar. No kidding.]

27 February 2010

Hamantashen!

A's house = hamantashen paradise.
Seriously, we made probably 391 hamantaschens.
Don't believe me? Check these blurry images out [I didn't bring my camera so I used my phone... JB brought her pro camera and took a zillion photos, and each click had that awesome shutter noise... but I can't use her images because this is my blog and I believe there are some copyright issues at some print in the book. Anyway.]!


Apricot, strawberry, raspberry, chocolate chip hamantashens. Note the chocolate chip dough :D My favourite jams are apricot jam and cherry jam. I don't really have a predilection for strawberry jam... maybe because I've had it for all my life. Oh, and the secret to the "best" hamantashen dough? Orange juice!!!!